
This week I have a short and sweet tutorial for you. Today we’ll be looking at Ladder Stitch. This is a simple basic stitch that is used as the base of many other stitches. It won’t take long for you to learn and then you’ll be ready to tackle stitches like brick and herringbone.
Here is the video tutorial. If you are not a fan of videos, the step-by-step instructions can be found below. Let’s learn how to do ladder stitch.
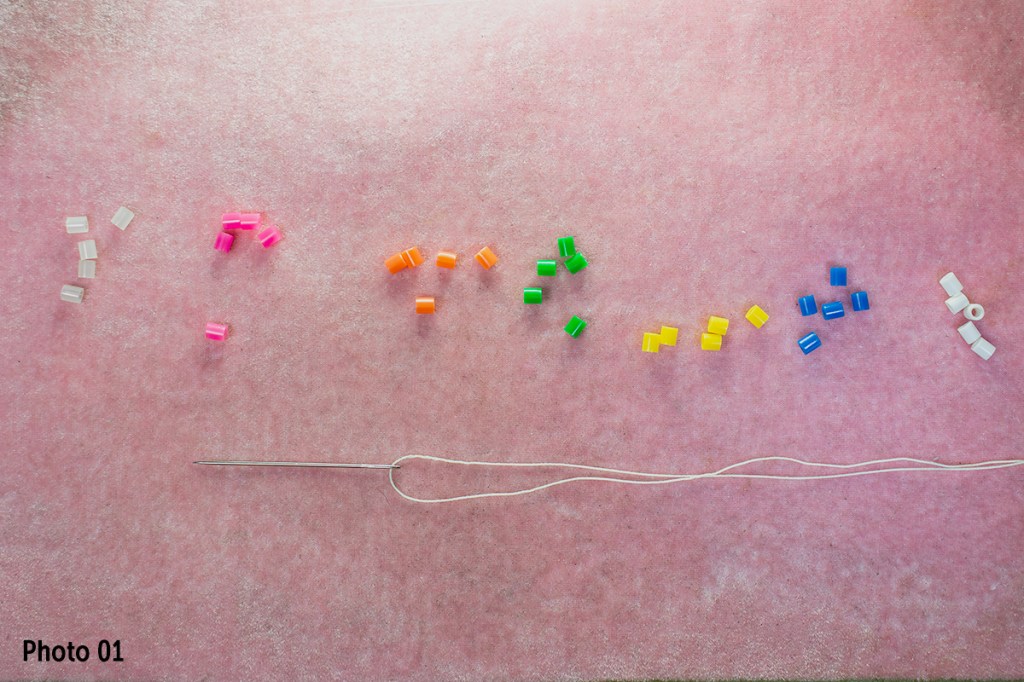
So before we begin, we need to thread our needle. Make sure that you are using a comfortable length of thread for you.
You can read more about how to determine thread length in my flat even count peyote tutorial. Click HERE to read more.
For ladder stitch, we won’t need a stop bead. So let’s jump into the stitch basics.
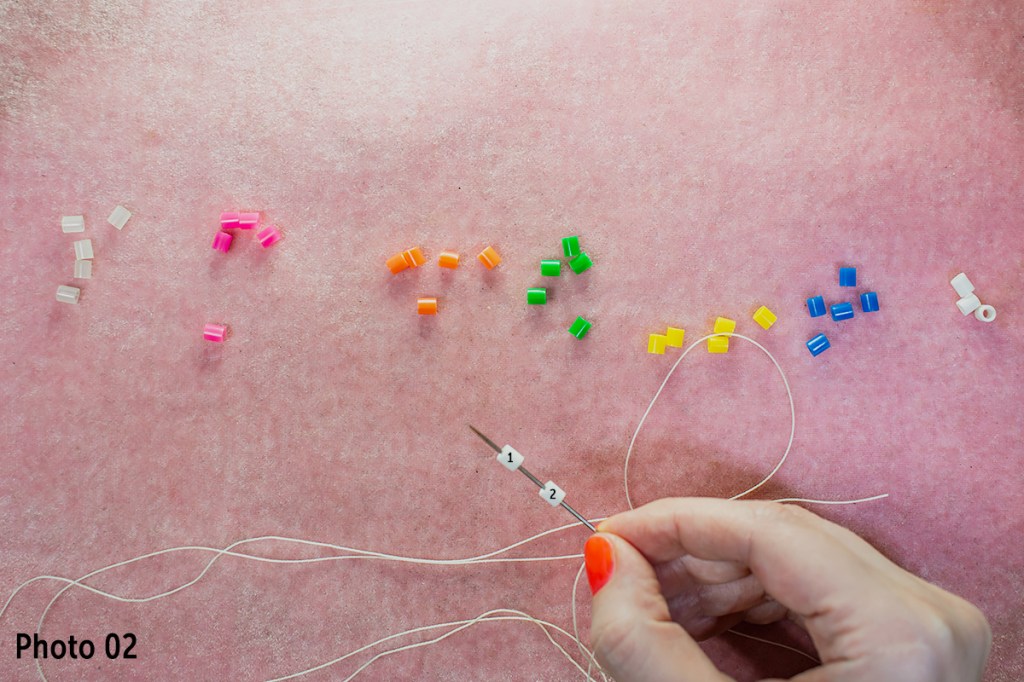
Pick up two beads, see photo 02
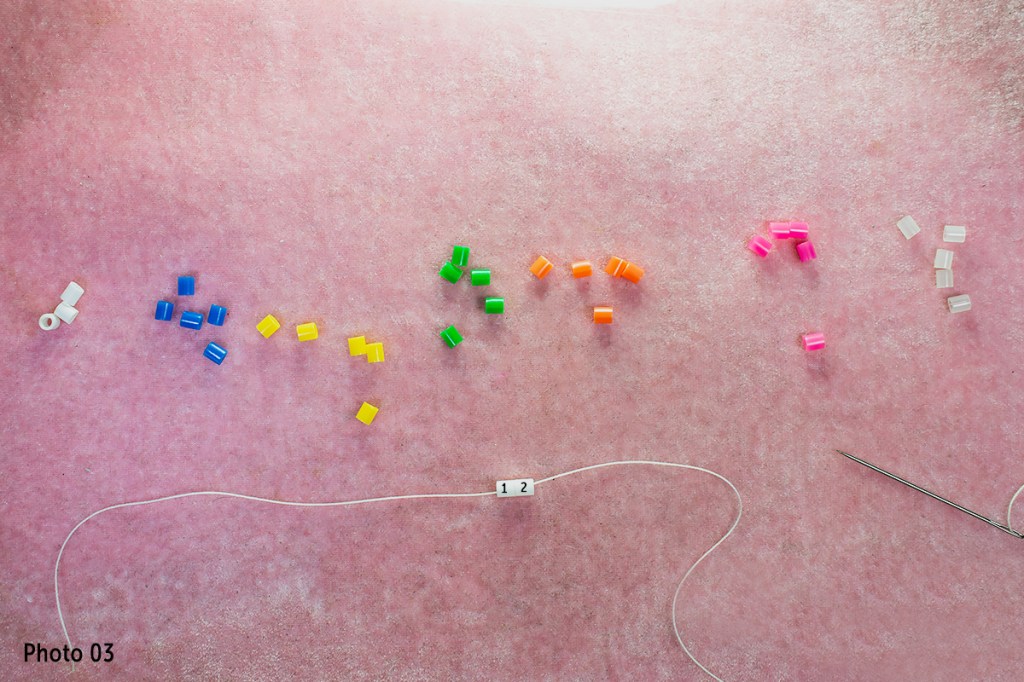
Slide those beads down your thread until you have a comfortable tail length. You’ll have two beads on your thread. See Photo 03
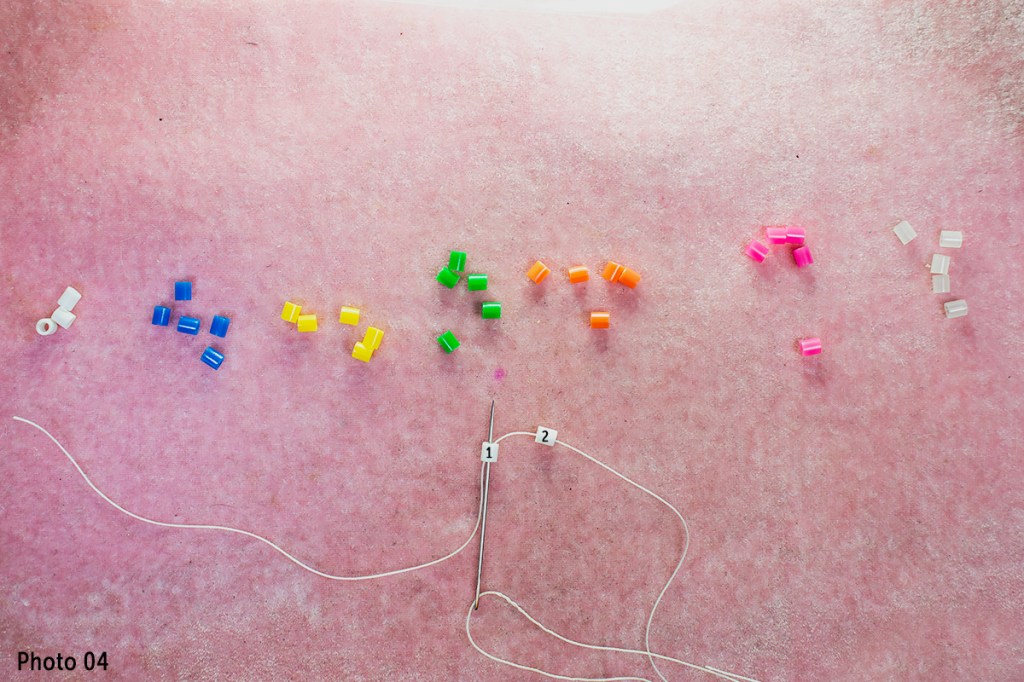
Go back up through the first bead in the direction of the string. So you will be making a loop with your thread. See photo 04
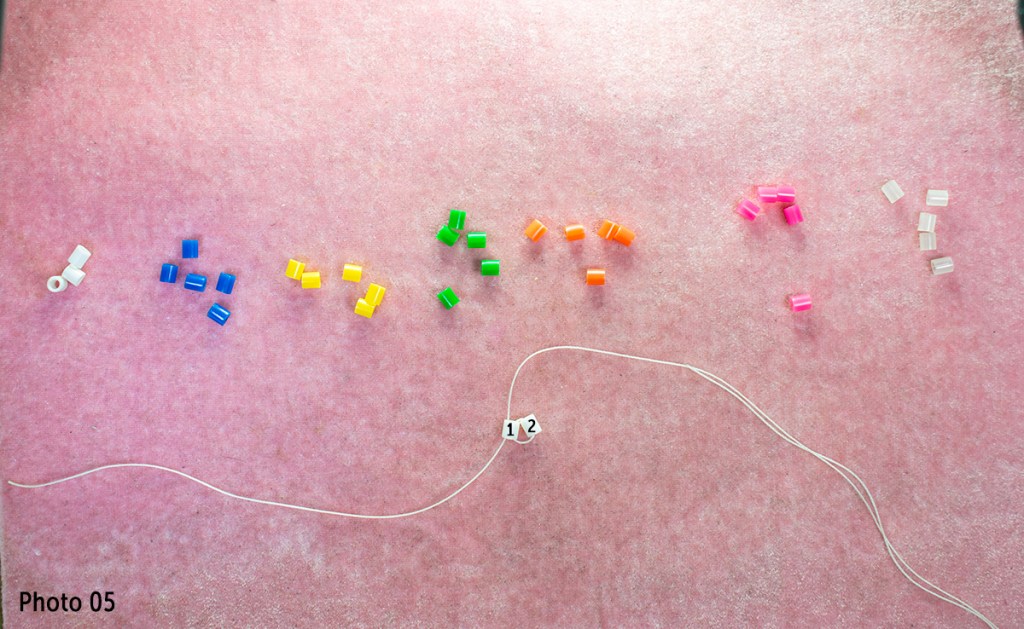
You will now have a loop of thread around your two beads. When you pull the thread taught, your beads will line up next to each other. This is the beginning of ladder stitch. See Photo 05
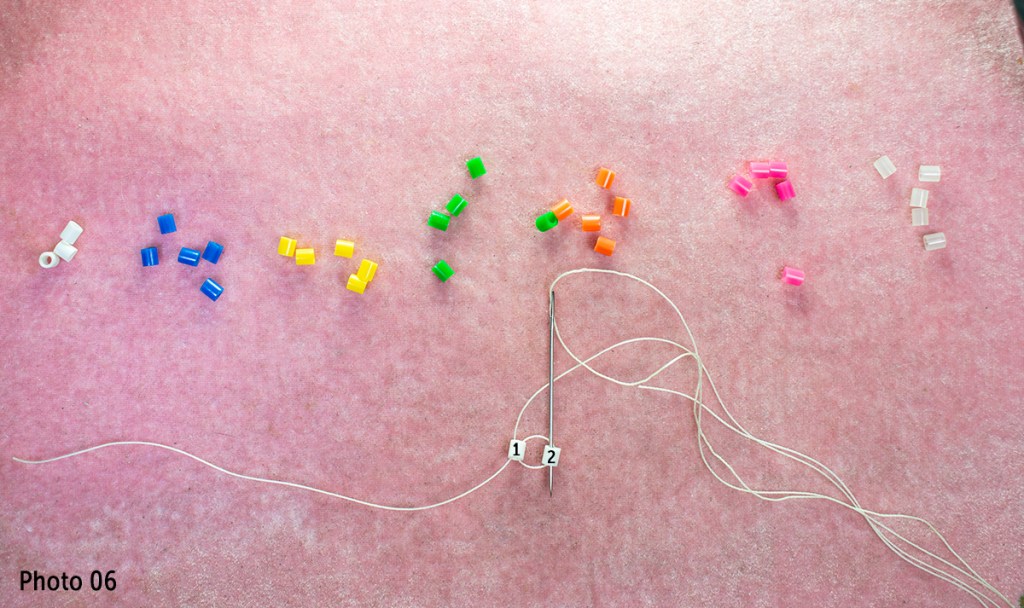
Then go back down through the second bead added. See Photo 06
This will reinforce the stitch and get you ready to add the next bead.
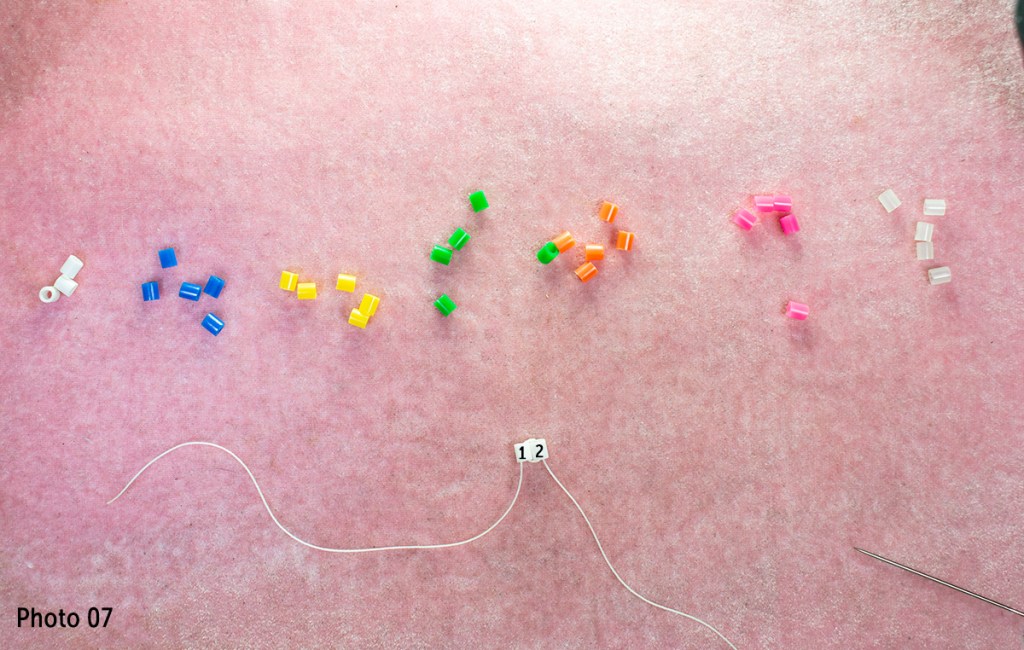
Pull the thread tight and your beads will snap together. See Photo 07
You are now ready to add your next bead.
Bead Tip
If your beads don’t seem to want to stay together, you can go through them again to reinforce the stitch. I demonstrate this in the video above. This will hold them tighter together because there is more thread for support. I only do this if I know I will have enough room to go through the beads multiple times without breaking them.
You also have the option of using a thicker thread or conditioning your thread with beeswax or a thread conditioner.
All of these options will help make this stitch more sturdy.

Pick up ONE bead this time. Slide that bead next to bead #2. See photo 08
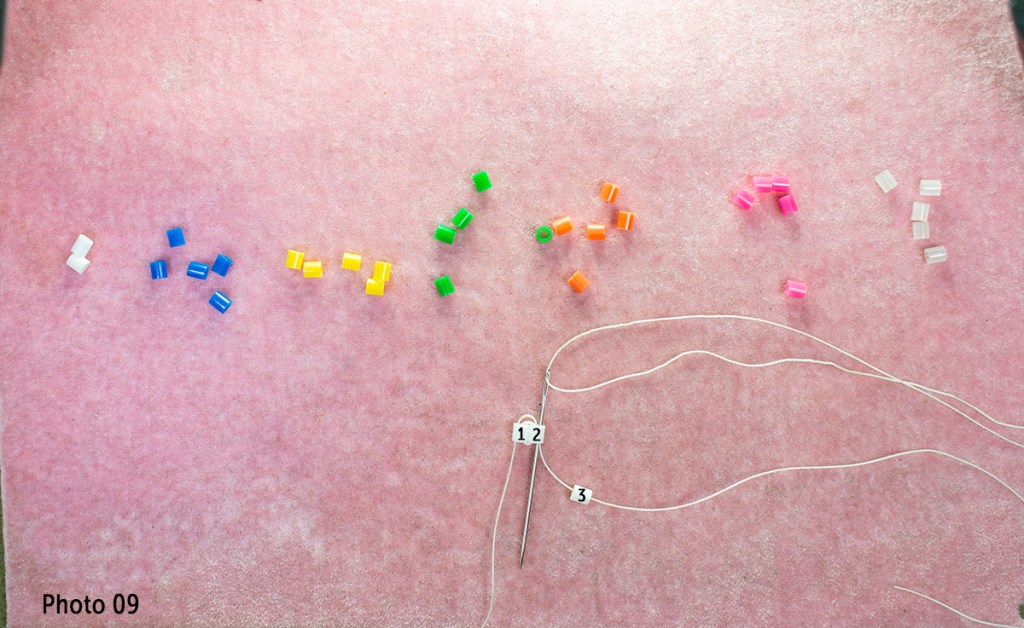
Then go back down the previous bead (bead #2). You will be making a loop and this will hold the next bead on. See photo 09
Pull your thread tight so bead #3 snaps in next to bead #2.
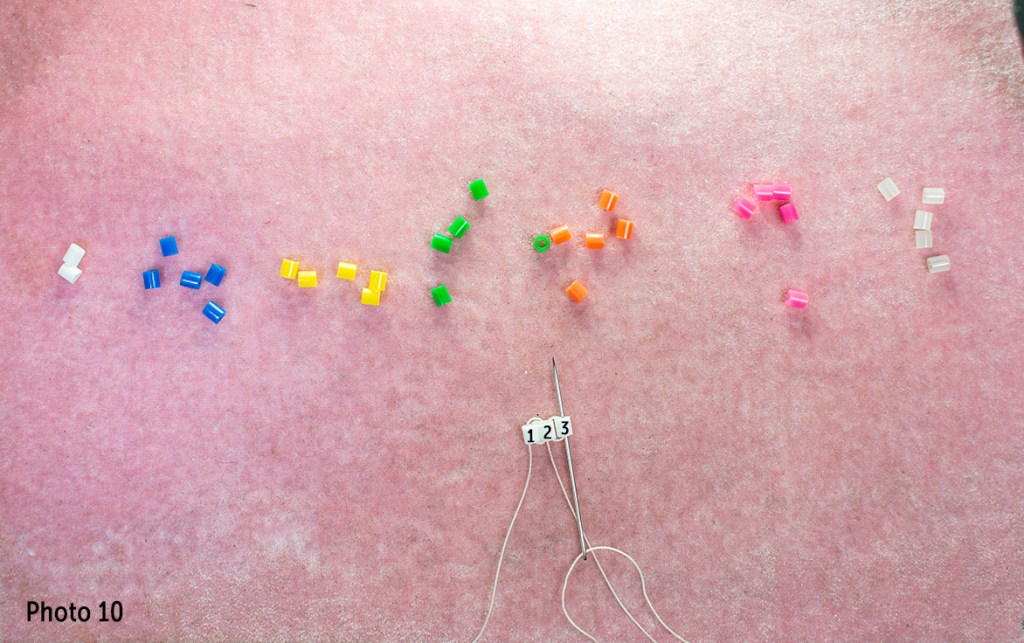
Go back up through bead #3. This will reinforce the stitch and get you ready to add the next bead. See Photo 10
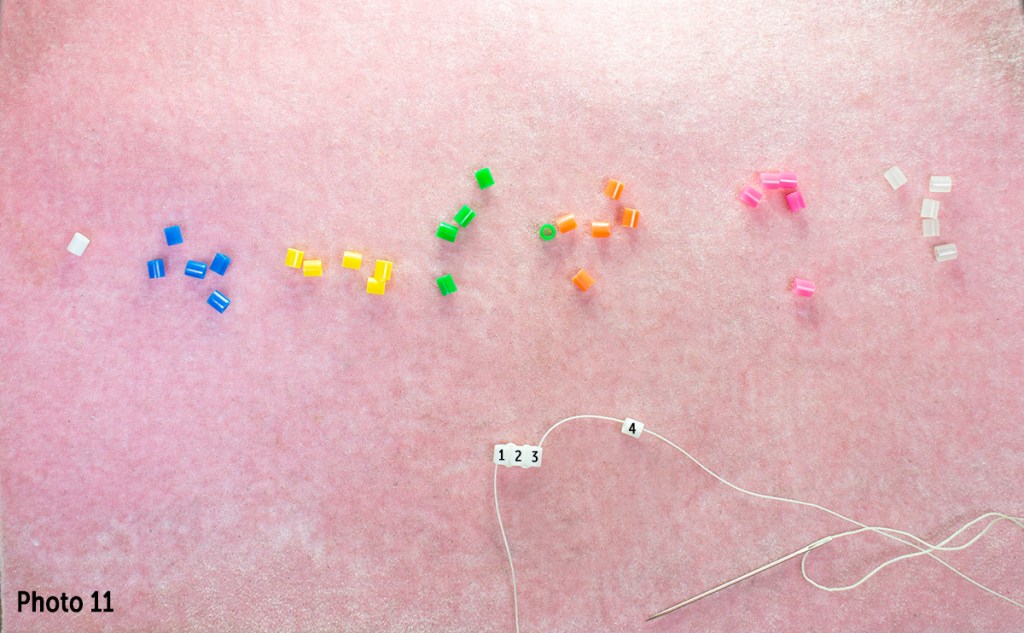
Pick up one bead. Slide that bead close to your row of stitched beads. See photo 11
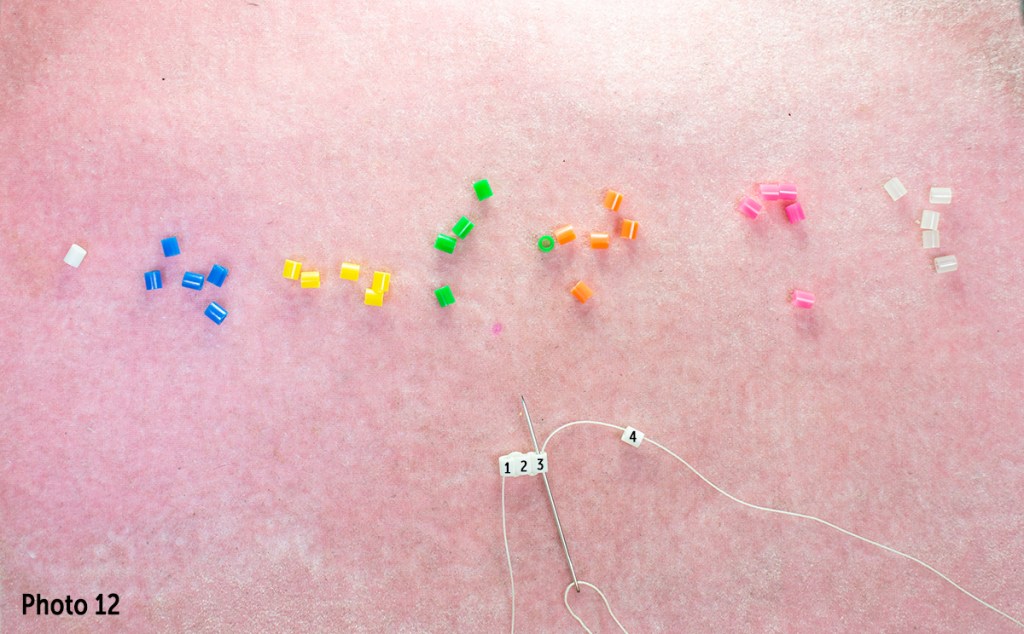
Go back up through the previous bead (bead #3). This will create a loop that will attach bead #4 to your beadwork. See Photo 12
Pull your thread tight to snap bead #4 in next to bead #3.
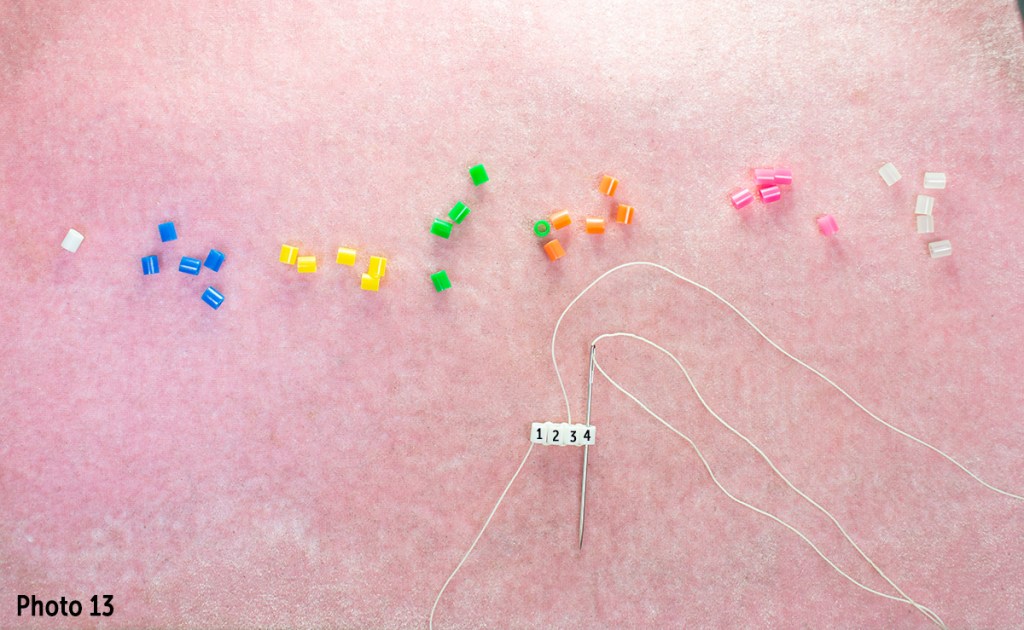
Then go back down through bead #4. This will reinforce your beadwork and get you ready to add your next bead. See photo 13
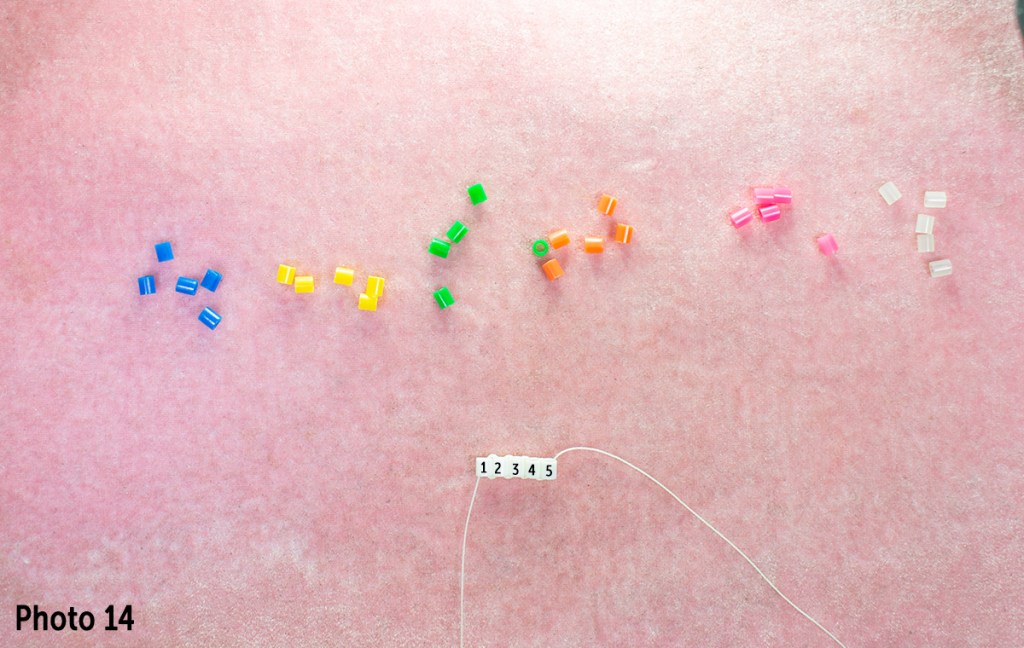
Continue adding beads this way until you get to your desired length. Your beads will line up next to each other forming a “ladder”.
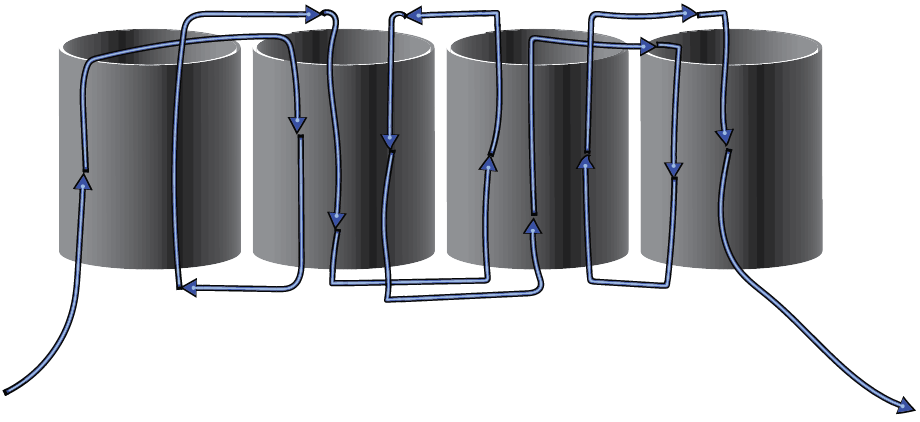
Here is a diagram of the thread path in ladder stitch. You are basically making a loop each time you add a bead.
Now that you have a feel for ladder stitch you are ready for other stitches that use ladder stitch as a base, such as brick stitch and herringbone stitch.
I will be covering brick stitch in my next tutorial and flat herringbone after that. So stay tuned for more tutorials!

Looking for more bead tutorials?
Even Count Flat Peyote Stitch – Click Here
How to read a Peyote Word Chart – Click Here
Brick Stitch – Coming Soon
Herringbone Stitch – Coming Soon
Two Drop Even Count Flat Peyote Stitch – Coming Soon
Odd Count Flat Peyote Stitch – Coming Soon
And many more!
Want to get beady updates sent right to your inbox? Maybe you’d be interested in a 25% off coupon? Sign up for my email newsletter today and get all that and more!


this is the best tutorial I have seen. I love that you have it in both videos and
pages as I am always stopping the video and going back to a book! Thank you!
LikeLike