
You asked for it, so I delivered it. I will be doing a series of beady tutorials. I’m working on my video skills, so there will be both video and written tutorials (with pictures of course) for each topic we cover.
Today we are going to tackle one of my most requested tutorials. This is the one that I get asked the most about. It’s decreasing/increasing brick stitch.
If you are new to beading or just new to brick stitch, odds are you’ve purchased a pattern and then just stared at it not knowing where to start. I know I’ve been there. There was a time when I didn’t understand at all how to complete a brick stitch pattern.
So today we are going to fix that. I am going to show you how I do increasing and decreasing stitches when working up a brick stitch pattern. There are a few different ways to do these, so I am going to show you how I do it. I want to remind you that there is no wrong or right way to do this. I feel that you have to figure out how to do something in a way that makes you comfortable and works for you.
If you are interested in purchasing some patterns, you can find many patterns in my Etsy shop. I have both simple ones great for beginners and ones that are for those of you looking for a challenge.
Previous tutorials
– Ladder Stitch
– Brick Stitch
– Even Count Peyote Stitch
– Reading a Peyote Word Chart
– Reading a Peyote Graph
Let’s get started.
Here is the video for all of you who prefer to follow along that way.
If you’re not that into videos or you are somewhere where you can’t watch a video, there are step-by-step directions under the video.
Looking for some amazing Brick stitch patterns? Check out all the patterns I have to offer in my Etsy Shop!
First, when doing any beadwork, you want to make sure that you are using a comfortable amount of stringing material. There are a few camps when you talk about thread length.
- One camp likes to use the full length of thread that will be used for the project. This way you never have to work a new thread in.
- The second camp uses just an arm’s length worth of thread. This way you pull the thread through with one pull and you reduce the chances of tangles. You do have to work a new thread in this way.
I personally like to use the second method. I will measure out two arm lengths of thread, then I will double up the thread (sometimes I use a double thread, sometimes I use a single thread, but I pull 90% of the tail end through the needle, so it’s about one arm’s length worth of material for each pull). I find this method is the easiest on my hands and arms when I bead.
When I first started out, I tried the first method and it was so frustrating to me. I had so many tangles it made me want to give up, but I didn’t want to work in a new thread (a fear of all new beaders). But I eventually learned that working thread in is not something that should be feared and it’s a lot easier than you think (there will also be a short tutorial for that).
It is up to you what you want to use. There is no right or wrong way and you have to find the way that works best for you.
Bead Tip
Make sure to leave a good amount of thread as your tail so that it’s not a hassle to work it into your beadwork when you are finished.
** If you have never done brick stitch before, you can find a tutorial for ladder stitch here and a tutorial for brick stitch here. Check these out before you start this tutorial because I am going to just focus on how to do the increases and decreases in this tutorial. **
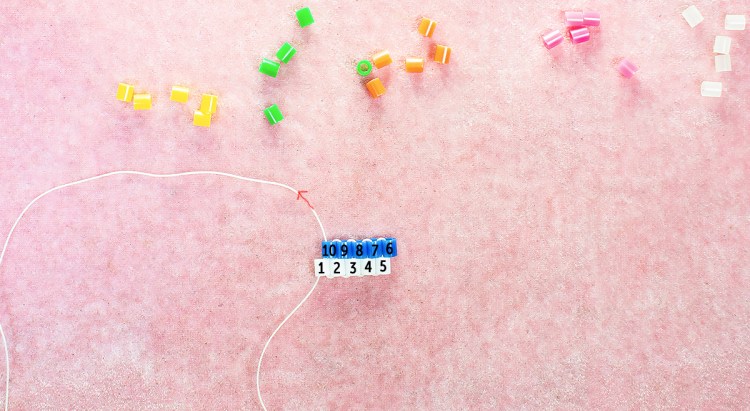
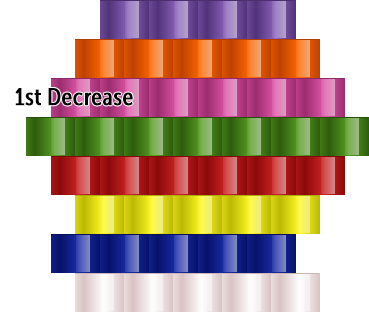
Here is the pattern we are going to be using. It has both increasing and decreasing rows. I know it’s nothing fun, but it will show how to increase and decrease using brick stitch.

As always, I’ll be using these great melty beads (perler beads) so that you can see every step clearly. I’ll also be using a large needle and some heavy-duty thread. These are not only great for me to demonstrate different stitches to you, but they are great for people who are new to beading. So if you’re worried about using those tiny little beads, that’s okay, start with these and it will be smooth sailing.
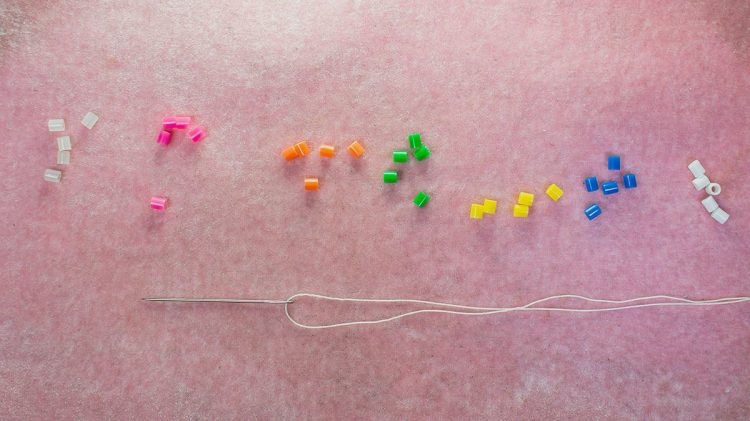
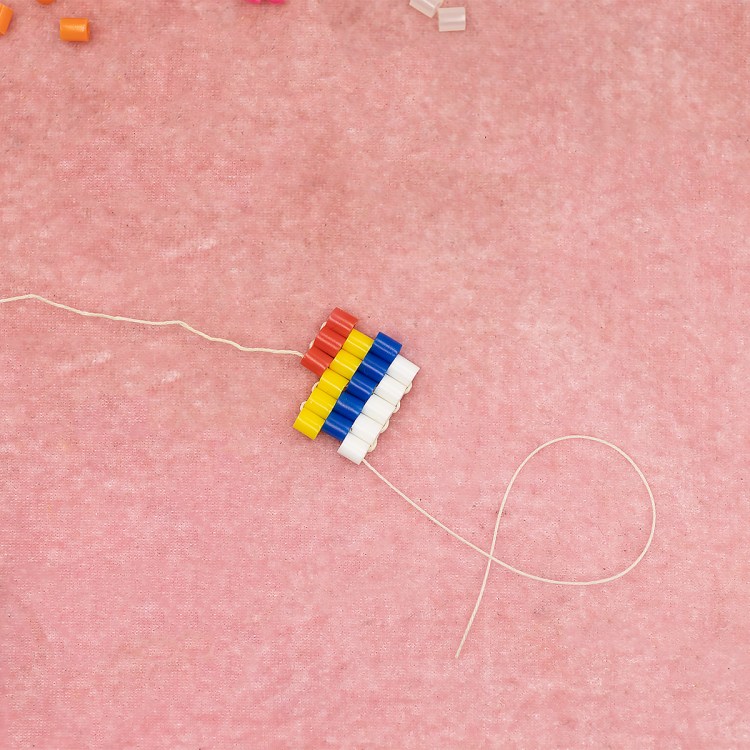
Let’s get started. First, we’ll thread our needle. For brick stitch, you do not need to use a stop bead. We are going to construct a bottom by weaving in and out of the beads. This will create a strong foundation for our beadwork. This is done by creating a row of Ladder Stitch. You can see the tutorial here.

In this example, I used 5 beads for my ladder stitch base. See the photo above.
I’m going to do another row of 5 in “normal” brick stitch. Again, if you need a refresher on how to do this, check out the brick stitch tutorial here.
And one more “normal” row of 5 beads. Again check out the brick stitch tutorial, HERE, if you need a refresher.
Now we are going to start our first increase row. We are going to add an extra bead to this row.
We are going to start the row just like we would normally. It’s when we get to the end that it gets a little crazy.

So, here we are with our row of five red beads. Now we want to increase by one bead.
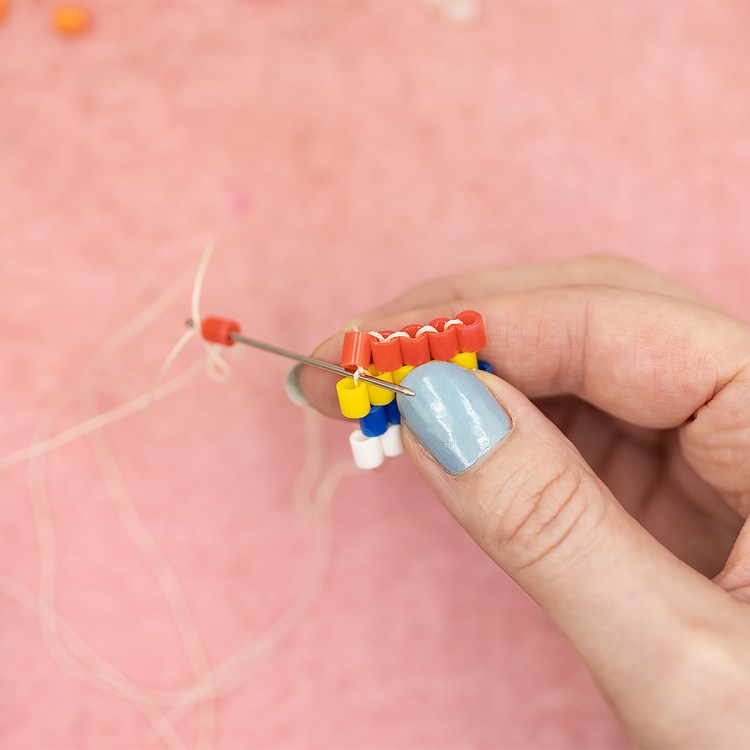
Pick up one red bead and go back under the thread between beads 11 and 12. Then back up the bead you just picked up (normal brick stitch).
You will have gone under the thread between beads 11 and 12 twice. This will give you an increase of one bead for this row.

Go back up through the bead you just added like normal and pull the thread taught.

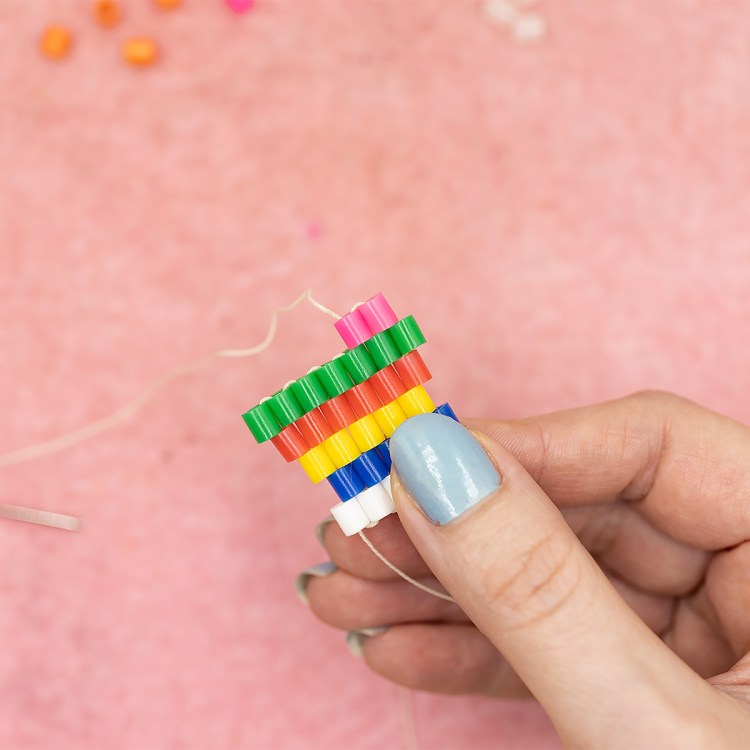
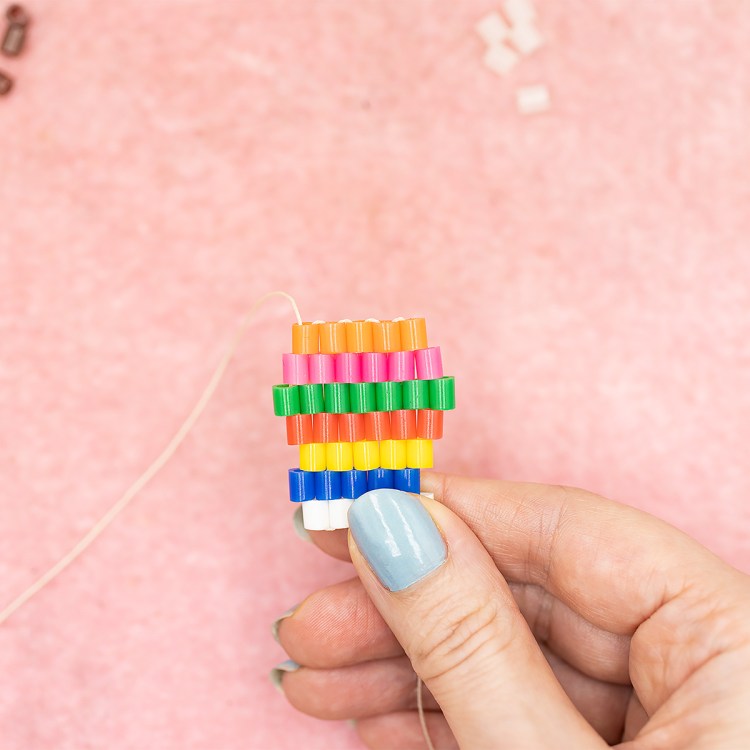
Here is what the first 4 rows should look like, with the fourth row (red beads) having a one-bead increase.

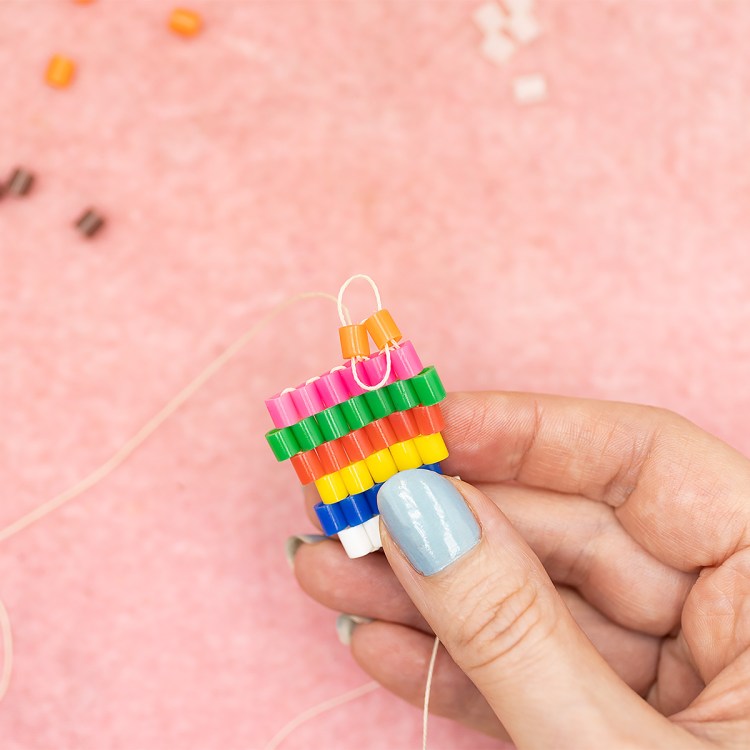
Let’s practice that increase one more time. Do a row of green beads. Since we had an increase in the last row, we will now be adding 6 beads.
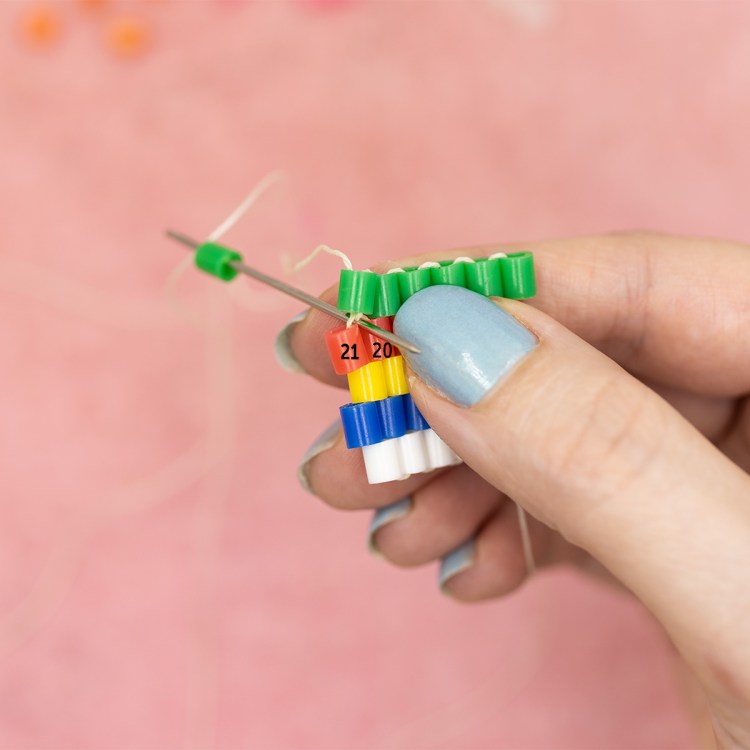
Now pick up our increase bead and add it like we did last time. Go back under the thread between beads 20 and 21. Then back up through the bead.

Here is what our five rows will look like. The red row has a one-bead increase, making it a row of six. The green row has an additional one-bead increase, making it a row of 7.
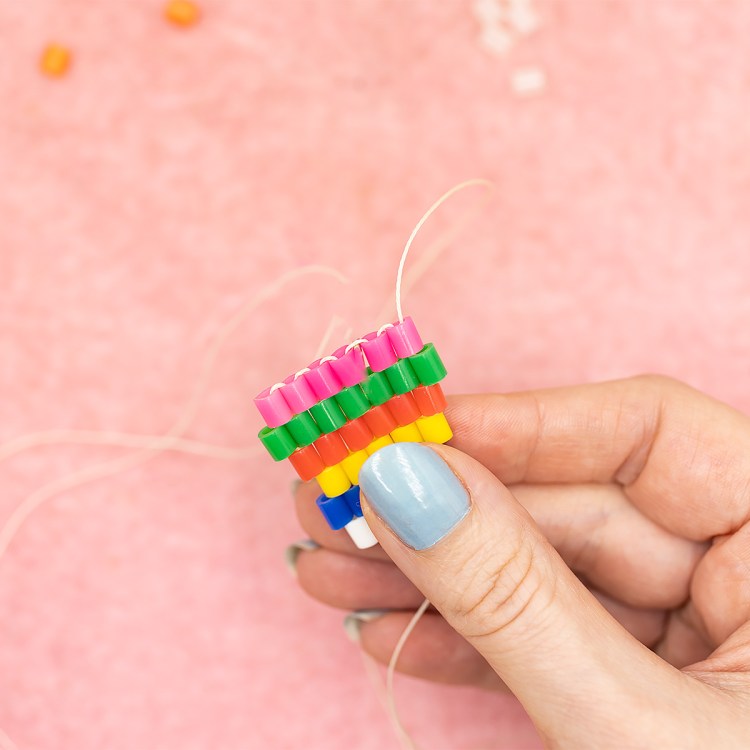
Now it’s time for a decrease. We will be using one less bead in this row, the pink row.

When you decrease in brick stitch, the tricky part is the first stitch. You don’t go under the thread between your first two beads like you normally would. You hop on over one and go under the thread between the second and third beads.

Now when you do that, your first two beads will look like this. They will be a little wonky, so they will need to be snugged up against each other.
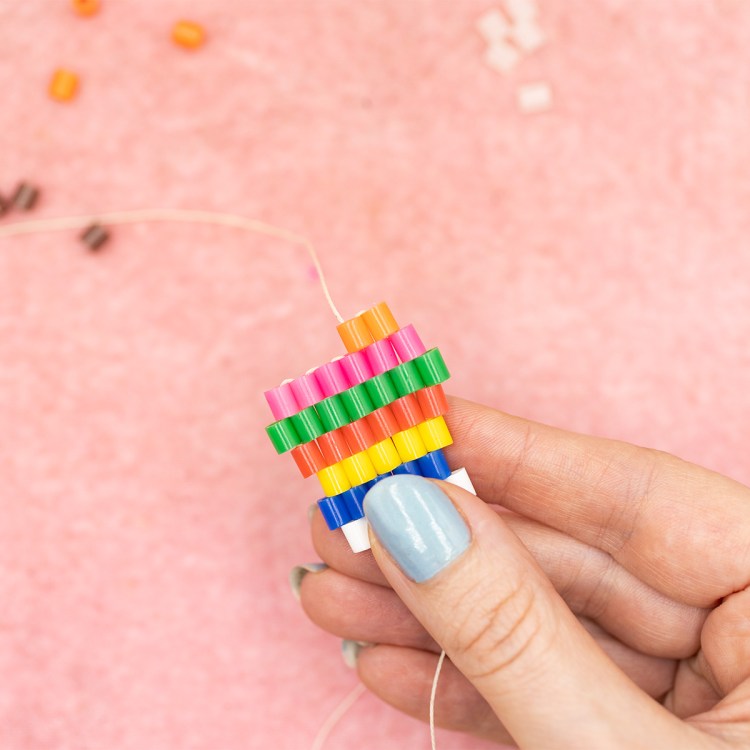
Go through the beads, like you were doing a ladder stitch; down through the first bead and then back up through the second bead. Pull tight.

This will snug the beads up to each other.
So now you have your two first beads started and snug up to each other, just finish the row like you normally would.
Once complete row. Since we decreased, this row will only have 6 beads in it.
That wasn’t too hard.

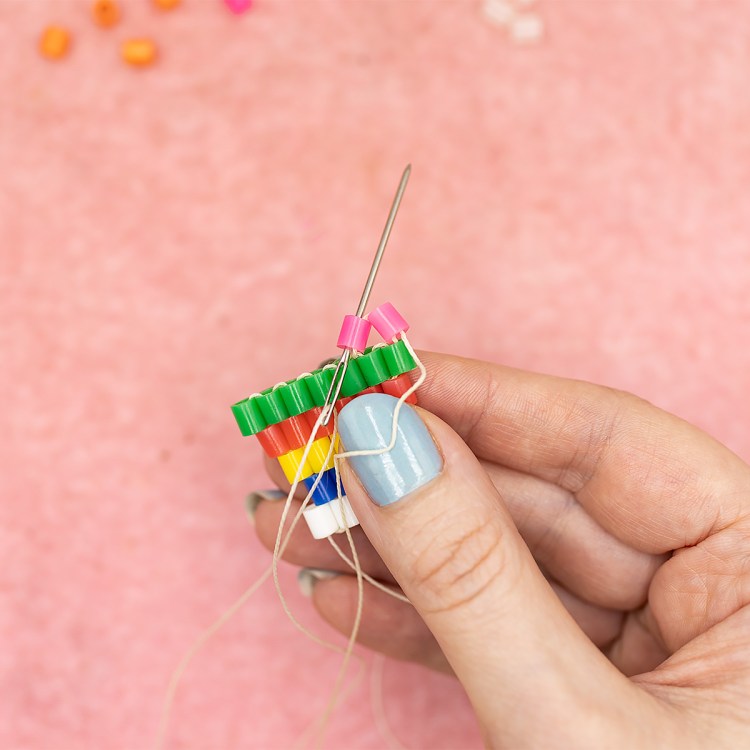
Let’s try a decrease one more time. Pick up the first two beads and go under the thread between the second and third beads.
Then snug them up by going through both of them again (down through the first bead, up through the second bead, pull snug).
Once you have the first two beads snug, you can continue with the rest of the row.
Then just continue the row like normal and you have another decrease row.
So that is how you increase and decrease when doing brick stitch. It might seem a little scary when you first start, but it’s not that bad once you get the hang of it.
You now have the knowledge to try a brick stitch pattern. Start with something simple, like this heart pattern. Then you can move on to something a bit more tricky, like this Luna Moth Pattern.
You can check out all of my brick stitch patterns HERE.
What did you think of this tutorial? Do you have any tricks or tips about increasing or decreasing brick stitch that you would like to share? Please leave a comment below.

Looking for more beady tutorials?
Even Count Flat Peyote Stitch – Click Here
Ladder Stitch – Click Here
Brick Stitch – Click Here
How to Read A Peyote Word Chart – Click Here
How to Read a Peyote Graph – Click Here
Square Stitch – Coming Soon
Two Drop Even Count Flat Peyote Stitch – Coming Soon
Odd Count Flat Peyote Stitch – Coming Soon
And many more!
Want to get beady updates sent right to your inbox? Maybe you’d be interested in a 25% off coupon? Sign up for my email newsletter today and get all that and more!


One thought on “Tutorial: Increasing/Decreasing Brick Stitch”